Hitch N Go Cargo Rack Lift Assembly | Lift Assembly only for Existing Cargo Racks | Great Day HNGC-350LA
- Brand
- Great Day, Inc.
- SKU:
- HGNC-350LA
- UPC:
- 872264005172
- Availability:
- BTO- Ships in around 1 week.
Hitch N Go Cargo Rack Lift Assembly | Lift Assembly only for Existing Cargo Racks | Great Day HNGC-350LA
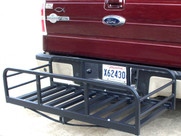
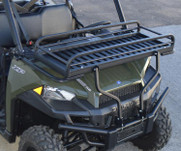
If you already have a Cargo Rack/cargo rack, but you want to be able to transport your Cargo Rack easily by using your hitch receiver, then this Great Day Cargo Rack Lift Assembly is the perfect solution. The Hitch N Go Cargo Rack Lift Assembly Will work on any brand Cargo Rack that is 23" wide and uses a 2" receiver. 350 lb capacity. Made in the USA!
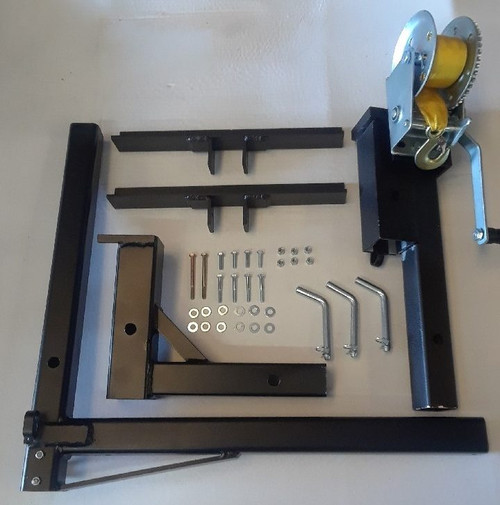
Hitch N Go Cargo Rack Lift Assembly Contents:
1 - Receiver Adapter6-1/4” locknuts
1 - Winch Coupling12-Flat washers
1 - Cargo Rack Mount “L” Bar
2 - Cargo Rack support brackets
3 - 1/2 Hitch pins with cotter pins
1 - Winch Handle
2 - 1/4 x 3” bolts
4 - 1/4” x 1” bolts
4 - 1/4” x 1 ¾” bolts
READ ALL INSTRUCTIONS AND WARNINGS BEFORE USING THE HITCH-N-GO CARGO RACK LIFT ASSEMBLY
NOTE: Failure to read instructions AND WARNINGS before use could result in injury or death.
Hitch N Go Cargo Rack Lift Assembly Instructions:
STEP 1: Review contents to ensure all parts are received.
STEP 2: Remove nut from winch Install handle, replace nut and tighten Set aside for later use.
STEP 3: Turn Cargo Rack upside down on work surface with handle facing to your right. Center Cargo Rack support bracket onto bottom frame of Cargo Rack . Mark holes in bracket on the Cargo Rack. Remove bracket and drill Cargo Rack on marks using a 5/16” drill bit. Repeat this step with bracket on opposite side of Cargo Rack.
STEP 4: Place brackets back onto Cargo Rack frame and attach with 4-bolts,8 washers and 4 locknuts. (NOTE: BOTH 1” AND 1 ¾” BOLTS ARE PROVIDED FOR YOU TO CHOOSE FROM). Use wrenches to tighten the hardware
INSTRUCTIONS FOR MOUNTING HITCH N GO CARGO RACK LIFT ASSEMBLY TO VEHICLE
STEP 5: Place Cargo Rack mount “L” bar into support bracket with vertical part of “L” bar towards you and pointing down. (NOTE: MAKE SURE END OF BAR IS EVEN WITH THE OTHER SIDE OF Cargo Rack). Mark hole on “L” bar for drilling
STEP 6: Remove bar and drill on marks using a 5/16” drill bit. Return bar to brackets and attach with 2- ¼” x 3” bolts, 4- flat washers and 2 locknuts. Tighten bolts using wrenches. Cargo Rack can now be placed on its wheels.
STEP 1: Install receiver coupling into vehicles receiver hitch. .Secure with hitch pin and cotter pin.
STEP 2: Roll Cargo Rack up to the stop on the receiver coupling. Slide winch coupling into receiver coupling and over Cargo Rack bar. Pin receiver and winch coupling together using hitch pin and cotter pin.
STEP 3: Release latch on winch and pull strap down and attach to Cargo Rack bar.
STEP 5: Secure handle to Cargo Rack in its upright position using bracket and quick clip pin.
STEP 6: When Cargo Rack is in its fully raised position, it may be locked in place using a long shank lock (NOT INCLUDED).
STEP 7: To disconnect Cargo Rack from vehicle, reverse steps 1-5. Winch coupling can be stored in vehicle and receiver coupling can be left installed on vehicle.
STEP 4: Engage winch and raise Cargo Rack until it stops. Pin in place with hitch pin and cotter pin.
*WEIGHT CAPACITY OF THE LIFT ASSEMBLY IS 350 LBS. DO NOT EXCEED!!!
ALWAYS MAKE SURE HITCH PINS ARE IN PLACE AND SECURE!
DO NOT EXCEED WEIGHT CAPACITY OF HITCH-N-GO CARGO RACK LIFT ASSEMBLY!
NEVER HAUL PEOPLE OR PETS IN CARGO RACK!
ALWAYS MAKE SURE CARGO IS PROPERLY SECURED TO CARGO RACK!
MAKE SURE HANDLE IS SECURED IN UPRIGHT POSITION BEFORE DRIVING!
USE THE WINCH TO CONTROL THE SPEED OF THE CARGO RACK WHILE LOWERING IT. KEEP YOUR HAND FIRMLY ON WINCH HANDLE UNTIL CARGO RACK IS COMPLETELY LOWERED TO GROUND!


